참조한 강의 : Spring & Hibernate For Beginners (www.udemy.com/course/spring-hibernate-tutorial/)
- Role
Spring Security 를 사용하면 유저의 아이디와 비밀번호에 대한 검증 뿐 아니라, 유저의 타입에 대해서도 검증할 수가 있다.
이 유저가 관리자 계정인지 아니면 일반 직원 계정인지, 아니면 제 3 자의 계정인지 이런것들을 판별할 수 있는데, spring security 에선 이 유저의 역할 즉, role 을 지정해줄 수 있다.
role 이 어떤 상수 값이 있는게 아니고, 개발자가 임의로 만들 수 있고, 각 유저에게 부여할 수 있다.
이번 포스팅에서는, role 설정을 어떻게 하는지, 그리고 role 에 따른 웹 리소스 접근 제한을 어떻게 적용시키는지 알아본다.
- Role Configuration
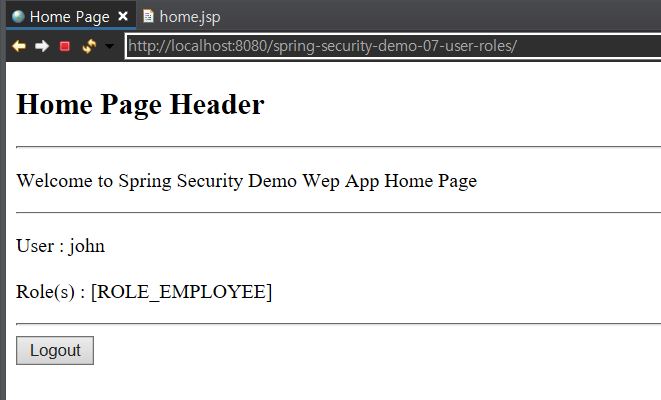
먼저 유저의 role 을 설정해보고 화면상에 role 을 띄우는 것 부터 해본다
그러기 위해선 먼저 Spring Security JSP Tag Library 라는것을 프로젝트가 사용할 수 있게 해야한다
(jsp 파일이 spring security 가 보내는 값을 읽어오는데 사용되는 jsp 라이브러리)
- pom.xml
|
<!-- Spring Security JSP Tag library -->
<dependency>
<groupId>org.springframework.security</groupId>
<artifactId>spring-security-taglibs</artifactId>
<version>${springsecurity.version}</version>
</dependency>
|
cs |
다음으로 jsp 파일에 이 라이브러리를 사용하겠다는 것을 명시해야한다.
- jsp
|
<%@ taglib prefix="security" uri="http://www.springframework.org/security/tags" %>
|
cs |
그리고 나서 유저의 role 을 화면으로 보여주기 위해서는
|
<p>
User : <security:authentication property="principal.username" />
<br><br>
Role(s) : <security:authentication property="principal.authorities"/>
</p>
|
cs |
<security:authentication> 이라는 태그를 사용해야 한다.
첫번째는 username 을 보여주는것이고, 두번째는 role 을 보여주기 위한 태그이다.
이를 실행해보면 아래와 같이 ROLE_~~ 형태로 나오는것을 볼 수 있다.
role 에 대한 값 설정은 이전 포스팅에서 in-memory 방식으로 한적이 있는데 아래 링크 참조
Spring Security - Configuration
참조한 강의 : Spring & Hibernate For Beginners (www.udemy.com/course/spring-hibernate-tutorial/) 이전 포스팅에서 간단하게 Spring Security 가 무엇인지 알아봤으니, 이번에는 Spring Security 를 프로젝트..
sdy-study.tistory.com
- Role 에 따른 접근 제한
: 다음으로, user 의 role 에 따른 페이지 접근을 제한하는 방법에 대해서 알아보자
DB 에 저장해서 연동하는것은 다음 포스팅에서 다룰 것이어서, 여기서는 그냥 어플리케이션 내부의 메모리에 저장하는 방식으로만 해볼 것이다.
메모리에 저장하는 방식은 이전 포스팅에서도 했듯이 이런식으로 작성하면 된다
(다시 말하지만, 실제 개발에선 쓰지 않을 방식이다)
- DemoSecurityConfig.java
|
@Configuration
@EnableWebSecurity
public class DemoSecurityConfig extends WebSecurityConfigurerAdapter {
@Override
protected void configure(AuthenticationManagerBuilder auth) throws Exception {
UserBuilder users = User.withDefaultPasswordEncoder();
auth.inMemoryAuthentication()
.withUser(users.username("tom").password("test123").roles("EMPLOYEE"))
.withUser(users.username("mary").password("test123").roles("EMPLOYEE", "MANAGER"))
.withUser(users.username("jerry").password("test123").roles("EMPLOYEE", "ADMIN"));
}
}
|
cs |
그리고 각 유저의 role 에 따른 웹 리소스 제한 하는 방법은
configure(HttpSecurity http) 메소드에 다음의 문법을 적용하면 된다
.antMatchers("url").hasRole("roleName")
- DemoSecurityConfig.java
|
@Configuration
@EnableWebSecurity
public class DemoSecurityConfig extends WebSecurityConfigurerAdapter {
@Override
protected void configure(HttpSecurity http) throws Exception {
http.authorizeRequests()
.antMatchers("/css/**").permitAll()
.antMatchers("/").hasRole("EMPLOYEE")
.antMatchers("/managers/**").hasRole("MANAGER")
.antMatchers("/systems/**").hasRole("ADMIN")
.and()
// 생략...
}
}
|
cs |
매칭될 url 과 role 을 지정해주면 된다
/managers 로 시작하는 모든 하위 url 들은 오로지 MANAGER 라는 role 을 가지고 있는 유저만 접근 가능한 것이고
/systems 로 시작하는 모든 하위 url 들은 오로지 ADMIN 라는 role 을 가지고 있는 유저만 접근 가능한 것이다.
그리고 이에 맞춰서 뷰페이지와 컨트롤러를 작성해주면 끝난다
- DemoController.java
|
@Controller
public class DemoController {
@GetMapping("/")
public String showHome() {
return "index";
}
@GetMapping("/managers")
public String showManagerPage() {
return "managers";
}
@GetMapping("/systems")
public String showAdminPage() {
return "admin";
}
}
|
cs |
- index.jsp
|
<%@ taglib prefix="form" uri="http://www.springframework.org/tags/form" %>
<!DOCTYPE html>
<html>
<head>
<title>Home Page</title>
</head>
<body>
<h2>Hello World!</h2>
<hr>
<p>
User : <security:authentication property="principal.username" />
<br><br>
Role(s) : <security:authentication property="principal.authorities"/>
</p>
<p>
<a href="${pageContext.request.contextPath}/managers">Managers Page</a>
</p>
<p>
<a href="${pageContext.request.contextPath}/systems">ADMIN PAGE</a>
</p>
<hr>
<form:form action="${pageContext.request.contextPath}/logout" method="POST">
<input type="submit" value="Logout" />
</form:form>
</body>
</html>
|
cs |
- managers.jsp
|
<!DOCTYPE html>
<html>
<head>
<title>Manager Page</title>
</head>
<body>
<h3> Manager Page ! </h3>
<p>
<a href="${pageContext.request.contextPath}/">Back to main page</a>
</p>
</body>
</html>
|
cs |
- admin.jsp
|
<!DOCTYPE html>
<html>
<head>
<title>ADMIN PAGE</title>
</head>
<body>
<h3>ADMIN PAGE</h3>
<a href="${pageContext.request.contextPath}/">Back to main page</a>
</body>
</html>
|
cs |
그러나 여기 까지만 작성하면, 권한이 없는 유저가 다른 권한을 필요로 하는 화면으로 이동할 수 있고, 접근시에 403 에러가 나게 되는데, 개발자가 아닌 일반 사용자 입장에서는 403 에러를 보면 당황할 수 밖에 없다
그러므로, role 에 따른 링크 자체를 아예 안보이게 처리해야하고, 403 에러 메시지 대신에, 사이트 자체적인 접근 제한 메시지를 보여주는 페이지가 작성되어야 한다.
먼저 유저가 가진 role 에 따라서 <a> 태그를 아예 안보이게 처리하는 방법은 아래 같은 문법을 사용하면 된다
- index.jsp
|
<%@ taglib prefix="security" uri="http://www.springframework.org/security/tags" %>
<!-- 나머지 부분 생략.. -->
<!-- only manager can see this link -->
<security:authorize access="hasRole('MANAGER')">
<p>
<a href="${pageContext.request.contextPath}/leaders">Leadership Meeting</a>
(Only for manager peeps)
</p>
</security:authorize>
<!-- only admin can see this link -->
<security:authorize access="hasRole('ADMIN')">
<p>
<a href="${pageContext.request.contextPath}/systems">System Settings Page</a>
(Only for admin)
</p>
</security:authorize>
|
cs |
<security:authorize access="hasRole('MANAGER')"> 를 쓰면 유저의 role 이 manager 인 유저만 보이게 하겠다는 의미이다.
그리고 이 태그를 쓰기 위해선 최상단에 반드시
<%@ taglib prefix="security" uri="http://www.springframework.org/security/tags %> 를 써야한다.
마지막으로 403 에러 화면을 아래 처럼 기본 에러 화면 대신에 다른 화면을 넣어주는 방법을 알아보자

먼저 Spring Security Config 파일에 다음과 같은 문구가 추가되야 한다
- DemoSecurityConfig.java
|
@Configuration
@EnableWebSecurity
public class DemoSecurityConfig extends WebSecurityConfigurerAdapter {
// 나머지 생략...
@Override
protected void configure(HttpSecurity http) throws Exception {
http.authorizeRequests()
// 나머지 생략...
.exceptionHandling().accessDeniedPage("/accessDenied");
}
}
|
cs |
exceptionHandling().accessDeniedPage() 부분에 접근 제한 당했을때 이동할 url 을 입력시킨다.
그리고 css 파일을 spring 이 인지할 수 있도록 app config 파일에 다음의 내용을 추가한다
- DemoAppConfig.java
|
@Configuration
@EnableWebMvc
@ComponentScan(basePackages="com.luv2code.springsecurity.demo")
public class DemoAppConfig implements WebMvcConfigurer {
// 나머지 생략.....
@Override
public void addResourceHandlers(ResourceHandlerRegistry registry) {
registry.addResourceHandler("/css/**").addResourceLocations("/css/");
}
}
|
cs |
WebMvcConfigurer 라는 인터페이스를 상속 받아서 정적 웹 리소스의 위치를 지정해 줘야한다.
그리고 jsp 와 css 를 설정해야 하는데, 아래의 사이트에 가면 코드를 얻어올 수 있다.
codepen.io/anjanas_dh/pen/ZMqKwb
403 - You Shall Not Pass [CSS illustration]
Contributing to the challenge of server errors. This week: 403 - FORBIDDEN. This was fun! And very educative....
codepen.io
참고로 위의 코드는 scss 이기 때문에, 컴파일 과정이 필요하다
scss 컴파일에 대한 부분 참조 : brunch.co.kr/@ourlove/55
[SASS] SASS 프레임웍 설치 + 부트스트랩 연동
4/15 개발일기 | 어제까지 git server 를 세팅하고, 그리고 spring+mybatis 개발환경을 셋팅했다. 오늘 오전에는 어제까지 구축해놓은 개발환경에 사내 테스트 DB를 연결하여 간단히 데이터를 뿌리는 실
brunch.co.kr
- 실행화면

여기 까지 유저의 role 에 따른 웹 리소스 접근 제한 방법과 403 페이지를 만드는 방법에 대해서 알아봤다.
다음은 DB 와 연동해서 회원가입을 만드는 방법에 대해 알아본다.
'Spring' 카테고리의 다른 글
| Spring REST - Overview (0) | 2021.03.07 |
|---|---|
| Spring Security - User Registration (0) | 2021.03.07 |
| Spring Security - CSRF (Cross Site Request Forgery) (0) | 2021.03.06 |
| Spring Security - Custom Login Form (0) | 2021.03.05 |
| Spring Security - Configuration (0) | 2021.03.05 |